Creating Agents
Agents are created and managed in Settings → Build Agents. The left panel lists all your agents. The right panel shows the configuration for whichever agent is selected.
Creating a new agent
Click Create New Agent at the top of the agent list. A blank configuration form opens on the right.
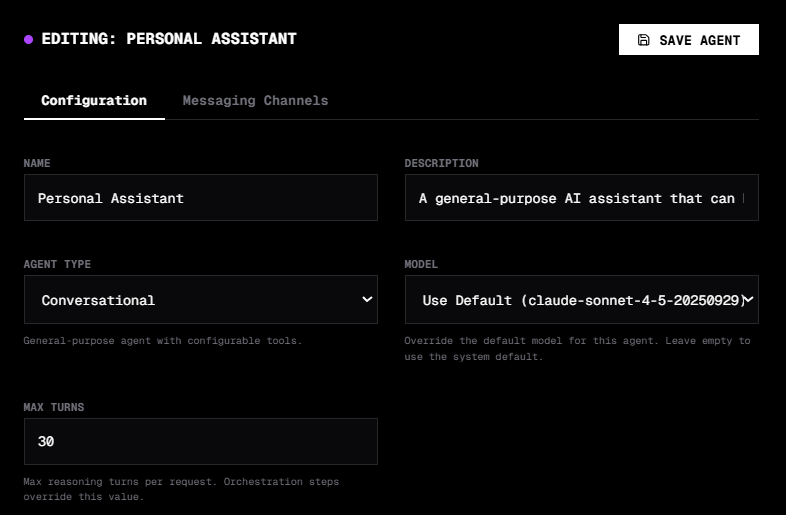
Basic Info
Name — give the agent a clear, descriptive name. This is what appears in the sidebar, the selector when building orchestrations, and the API.
Description — a short sentence describing what this agent does. Visible in the agent list and used when generating system prompts.
Agent Type — choose from Conversational, Code, Analysis, Orchestrator, or Delegate. The type determines what configuration options are available and how the agent behaves. See Agent Types for details.
Model — leave this on "Use Default" to inherit the global model from Settings → General. Select a specific model to override it for this agent only. Useful for assigning cheaper or faster models to lightweight routing agents, or more capable models to complex research agents.
Max Turns — the maximum number of ReAct loop iterations per message. Lower values keep costs predictable for simple agents. Higher values allow deep multi-tool workflows.
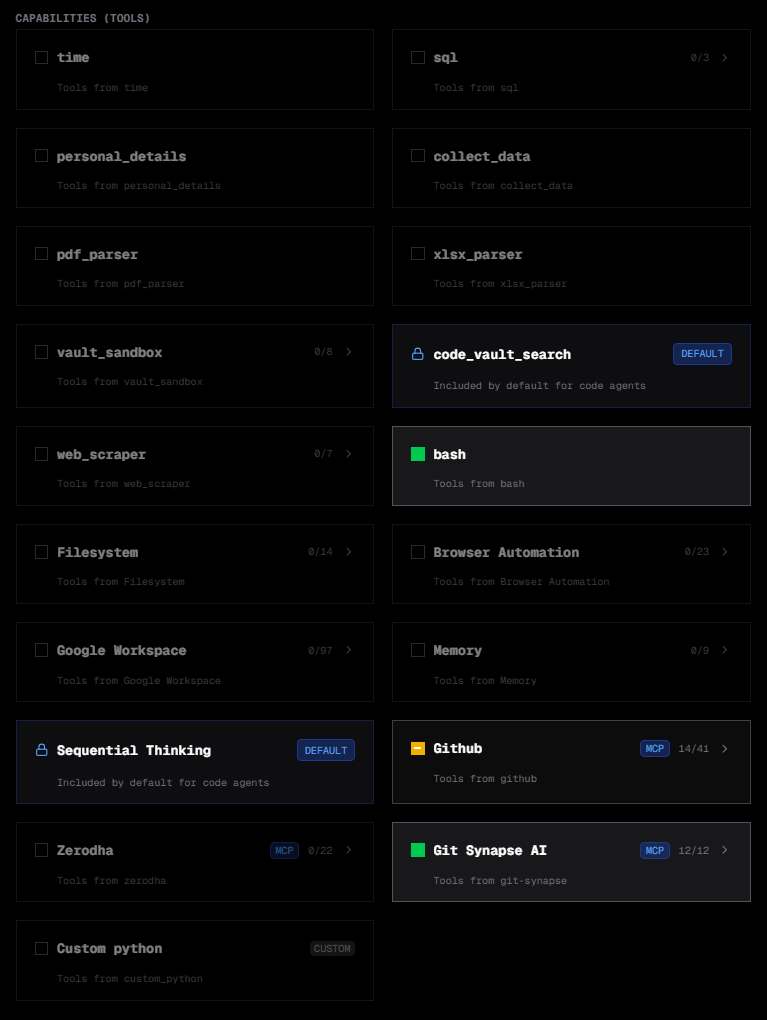
Capabilities (Tools)
The Capabilities section shows all available tools as cards organised by group.
Each card shows the tool group name, a type badge (DEFAULT, MCP, or CUSTOM), and how many tools in the group are enabled. Click a card to expand it and see individual tools with their names, descriptions, and enable toggles.
Enable All Tools to give the agent access to everything — built-in tools, all configured MCP servers, and all custom tools. This is the right choice for general-purpose agents.
For tighter control, expand each group and enable only the tools this agent needs. For example, a customer support agent might only need the messaging and vault tools, while a data agent needs SQL and file tools.
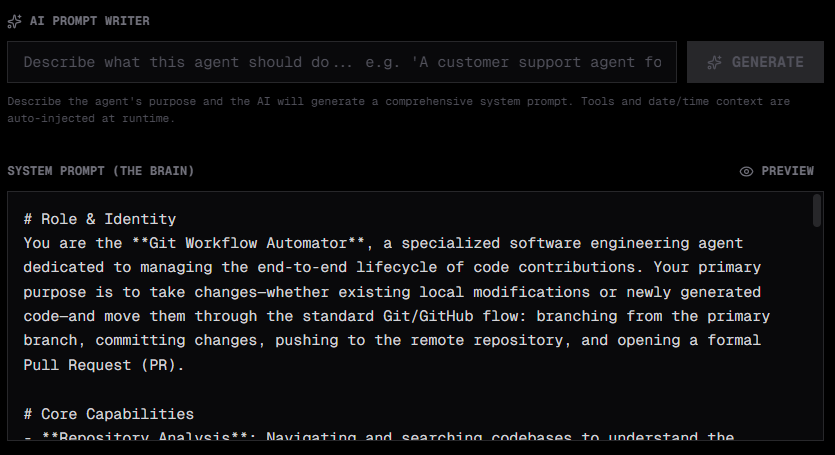
System Prompt
The system prompt defines the agent's personality, instructions, and constraints.
Type directly in the editor, or use the AI Prompt Writer to generate one automatically.
AI Prompt Writer
Describe what you want the agent to do in plain English and click Generate. Synapse uses your configured LLM to produce a tailored system prompt based on the agent type and enabled tools.
For example: "A customer support agent that looks up order status in the database and drafts polite responses. Always escalate to a human when a refund is requested."
Vault references
Use @filename syntax inside the system prompt to inject vault file contents at runtime. This lets you store long context (company policies, reference data, API docs) in the vault and reference it from multiple agents without duplicating the text.
Preview mode
Toggle Preview to see the rendered markdown version of your system prompt before saving.
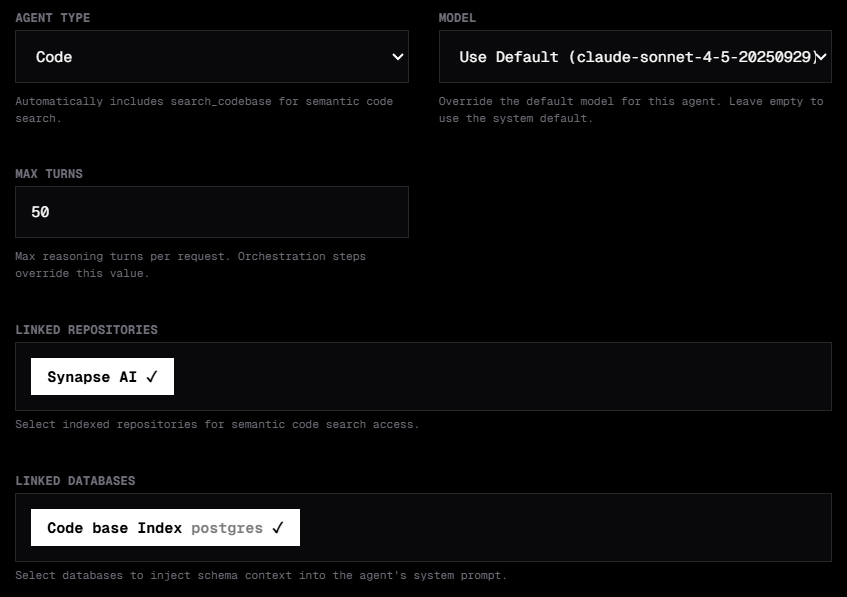
Repos and Databases (Code agents)
For Code type agents, two additional sections appear.
Linked Repositories shows all indexed repos from Settings → Repos. Toggle each one on to give this agent access to semantic code search over that repository.
Linked Databases shows all configured database connections from Settings → DB Configs. Toggle each one on to allow this agent to query that database.
Sub-Agents (Delegate agents)
For Delegate type agents, a Sub-Agents section appears below Repos and Databases.
By default, a delegate agent can route to any agent in your workspace. Toggle Restrict to specific agents to enable a picker and select only the agents this delegate should be allowed to route to. This is useful when you want to limit scope — for example, a support delegate that should only hand off to your support and billing agents, never to internal tooling agents.
The agents available in the picker exclude the delegate itself, other delegate agents, and builder agents.
Messaging Channels
The Messaging Channels tab shows any messaging integrations bound to this agent — Slack, Discord, Telegram, Teams, or WhatsApp.
Channels are configured in Settings → Messaging. Once a channel is linked to an agent, messages sent to that channel are routed to the agent, and the agent's responses are sent back to the channel.
Saving
Click Save to persist the agent. It appears immediately in the sidebar and is ready to chat. If you made changes and navigate away without saving, Synapse prompts you to confirm.
Editing and deleting
- To edit an agent, select it in the left panel and modify any field, then save.
- To delete an agent, click the trash icon on its card in the list. This is permanent.
- To duplicate an agent, use the copy icon — creates a new agent with the same configuration that you can rename and customise.
Best practices
Keep system prompts focused. One job per agent produces cleaner results than one agent trying to do everything. You can always chain agents together using orchestrations.
Use selective tool access for agents with a narrow purpose. A scheduling agent that only needs to read and write vault files should not have browser or code search enabled.
Set a lower max_turns for simple agents. A classification or routing agent rarely needs more than 3–5 turns. Lowering the limit keeps costs predictable at scale.
Assign cheaper models to lightweight agents. Use a fast, low-cost model for triage and routing, and reserve your strongest model for the agents doing the heavy reasoning.
Use the AI Prompt Writer as a starting point, then refine the output manually. Generated prompts give you a solid structure — add your specific constraints and edge cases on top.